Everything You Need To Know About Travel Trailer Winterization
The past two years of the pandemic have had a major impact on how people are thinking about the future. The freedom to work from home has inspired many individuals and families to take their lives on the road. Many racers are trading their hotel room experience for an enclosed living quarter trailer.
Being able to travel safely during COVID-19 while earning an income has opened up new possibilities for many people. Travel trailer sales have exploded across the country.
Think you’re ready for the RV lifestyle? Buying a travel trailer is the beginning of your next great adventure! Before you start reading travel trailer reviews, you need to know how to care for your travel trailer properly.
Owning and operating travel trailers isn’t rocket science. But, it does take some know-how to avoid making disastrous beginner mistakes.
Here’s what you need to know about the importance of travel trailer winterization and how it works.
What Is Travel Trailer and Living Quarter Trailers Winterization?
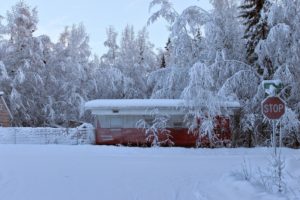
Winterizing your travel trailer is the process of getting it ready to sustain freezing winter temperatures in many parts of the country. If you live in a region that does not experience freezing winter weather, you’re off the hook!
The process of winterizing your travel trailer requires removing water from all of the water lines, tanks, and systems. This prevents the water from freezing during the winter and damaging your travel trailer.
When To Winterize Your Travel Trailer
The best time to winterize your travel trailer is when the temperature starts to drop consistently. When temperatures reach between 30 and 32 degrees Fahrenheit, it is time to begin the process.
It’s possible to winterize your travel trailer yourself by following the steps in this guide. However, many people feel more comfortable consulting a professional.
Getting Started
Before you start the winterization process, you will need to get a few things. You can find the majority of these items at any trailer parts store.
- Water pump converter kit
- Cleaning wand for the holding tanks
- Non-toxic antifreeze
- Socket wrench
You will also need to get a water heater bypass kit if your trailer doesn’t have one installed already. The amount of antifreeze your trailer requires depends on the length of the plumbing lines. Most require two or three gallons.
How to Winterize Your Travel Trailer
Once you have all of your materials, it is time to get started removing the water from your travel trailer and flushing the system. We’ve broken the travel trailer winterization process down into eight simple steps.
1. Drain/Flush Black and Gray Water Tanks
The first thing to do when winterizing a travel trailer is to drain the black and gray water tanks. If you leave water in these tanks it will freeze and cause damage to the tank.
In addition, the tanks are breeding grounds for bacteria when left sitting for months on end.
Drain the black water tank first, then the gray water tank. Once they have drained, make sure to clean the black water tank.
Some RVs have a tank flushing system built-in. If yours doesn’t, you can clean the tank using a cleaning wand.
Before you finish, make sure to add some lubrication (like WD 40) to the tanks’ termination valves.
2. Drain/Flush Water Heater
Another part of your travel trailer that holds water is your water heater. You will need to drain this as well.
Do not drain your water heater while the water is hot. When the water is hot it is also pressurized. You need to turn off the water heater and let the water cool down first.
Next, connect your trailer to the city water line while the water is turned off. Once that is connected, use a socket wrench to remove the drain plug/anode rod and open the pressure relief valve. The water will drain out.
When the water heater finishes draining, turn the water pressure back on. This will flush the sediment from your water heater. Let the water run for a few minutes, then turn it off.
3. Bypass Water Heater
Before you can introduce anti-freeze to your water systems, you need to bypass the water heater. If you don’t, anti-freeze will enter your water heater, causing damage and waste.
Some trailers have a water heater bypass system already installed. All you need to do is locate the access panel inside the water heater and adjust the bypass valves.
If your trailer does not have a bypass system, you will need to install a water heater bypass kit yourself.
4. Drain Fresh Tank/Low Point Drains
The next step in winterizing your travel trailer is to drain the fresh tank and the low point drains. Begin by making sure the water pressure is turned off. Then it is safe to remove the plug and drain the freshwater tank.
Open your trailer faucets and drains to assist the water flow out of the tank. Once the water has drained, close the faucets and plug up the low point drains.
5. Attach Water Pump Conversion/Syphoning Kit
If you have a water pump converter kit, follow the directions that come with it. If you don’t have a kit, start by disconnecting the water line coming out of the freshwater tank.
Next, connect a clear tube to the water pump inlet. Place the other end of the tube into a container of non-toxic antifreeze for trailers and RVs.
6. Open External Faucets and Valves
Open the trailer’s external faucets and valves, starting with the lowest. Then work your way up from the low point drain valves and plugs to let any residual water drain out.
Wait until the water starts to turn pink. That’s how you know the antifreeze is making its way through the pipes. When you see pink, close the valves and secure the plugs.
Turn on your external showers and faucets until the water coming from them turns pink as well. Then close them.
7. Open Internal Faucets and Valves
Do the same thing with your internal faucets and valves. Do one side of the trailer first, then the other side. Flush your toilets until the water in them turns pink.
8. Add Antifreeze to P-Traps
As a final step, add some extra antifreeze to the drain of each sink, shower, and toilet in your travel trailer. This will make sure your exterior pipes don’t freeze during the winter.
Finally, confirm that your water heater is shut off completely and all of your drains, faucets, and valves are closed.
Find Your Dream Trailer
Now you know the basics of how to prepare your trailer for the freezing temperatures of winter. Failure to winterize your travel trailer will result in significant damage to your water pipes, tanks, and systems. Be sure and schedule your travel trailer and/or living quarter trailer winterization each year. Our service department is also standing by to help you de-winterize your trailer and get ready for spring.
Travel trailer maintenance and care are key elements of taking your life on the road. When you are ready to start shopping for your dream travel trailer, contact Proline Trailers for all your new living quarter trailer needs.