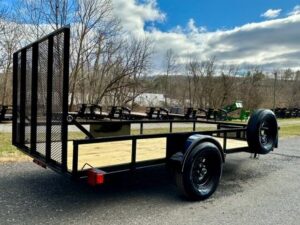
How to Properly Hook up a Single Axle Trailer
You finally bought the truck and are ready to live out your dreams of owning a motorcycle, starting a small business, or being able to trailer whenever you want. Once you buy a single axle trailer, your next step is to learn how to hook it up.
While it can seem intimidating, the multi-process step is relatively straightforward. This guide will walk you through properly hooking up a single axle trailer.
Prepare Your Vehicle and Trailer
Before you hook up a trailer to your vehicle, confirm the two are compatible. Check the ball size on your vehicle hitch and the coupler size on the trailer. You should see a standard trailer ball size measurement: 1-7/8, 2, 2-5/16, and 3-inch diameter (rare).
Each ball size works with a specific type of trailering activity, size, and weight. The ball and hitch need to match in size.
Next, check that the wiring on your vehicle is compatible with the wiring on the trailer. You may need an adapter if they are not.
Finally, check your vehicle’s towing capability. Your vehicle needs to have a tow rating higher than your trailer’s total weight and contents. Leave a cushion in this towing capacity, as it is unsafe to max it out.
Have a Partner or a Camera
The easiest method for hooking up a trailer is to have a partner that can help guide you. Agree on hand or voice commands that can let you communicate quickly. They should include directional signals for moving side to side, continuing backing, and stopping.
Many modern trucks and SUVs come with a backup camera. When the vehicle engages in reverse, the camera activates. This makes aligning the ball and coupler even easier. With practice, you can learn to use the camera to align the two.
However, do not forget to look around before and while reversing. You need to remain aware of your surroundings.
Line Up Your Vehicle
Position your vehicle in a straight line in front of the trailer hitch. It helps if the trailer position has plenty of space in front of it. Reversing straight back is much easier than moving left and right to maneuver back into place.
Raise the Coupler
Once your vehicle and trailer are aligned, use the hand crank to raise the coupler. Some people do this first before aligning and reversing their vehicle. Other people wait until their ball is a foot away from the coupler.
The coupler must be higher than the ball to go over the ball without restriction. You don’t need to raise it excessively high, just enough to go over the ball.
Align the Coupler and Ball
Finish reversing your vehicle so that the ball is directly under the coupler. If they aren’t aligning easily, you may need to pull forward and reverse again. Then, drop the coupler with the hand crank for the trailer hook up.
Check that the coupler latch is upright while lowering the coupler. Otherwise, it won’t entirely drop into place.
Manually Aligning the Trailer
If you have a small or lightweight trailer, you can line it up manually. You can maneuver the trailer into place behind your vehicle using a trailer jack. This method works well if you are not confident reversing or have limited space.
A trailer dolly has a long handle, a ball hitch, and two wheels. Hook the ball under the coupler. Lowering the handle raises the ball and lets you push and pull the trailer around.
Engage the Latch
The next step is to engage the coupler latch. You lift slightly to release it from the upright position and then drop it down into the horizontal position. You should also use the safety pin or coupler lock to secure the latch.
There is a hole in the latch that they hook through. You can use the hand crank to raise the coupler to test your hookup connection. This will lift the coupler latch and ensure it’s properly seated.
Hook Up the Chains
Two chains should be on either side of the trailer, as they are required by law. Crisscross them under the trailer’s coupler. Then, hook them to the rear of your vehicle. The chains create a cradle underneath the coupler.
If the trailer becomes disconnected from the vehicle, the chains catch the coupler to prevent it from crashing to the ground. This will allow you to stop the vehicle safely. The chains should not touch the ground when hooked up.
Each chain should have a weight rating that exceeds the gross trailer weight.
Put Up the Trailer Jack
Finish putting up the trailer jack by swinging it up and hooking it into place on the trailer. Some allow you to remove the wheel, while others do not. Some trailers do not allow you to swing the jack; it simply retracts up.
Connect the Wiring
Locate the trailer wiring connector on the back of your vehicle and connect it to the trailer wiring. It should be a simple male and female multi-pin connection.
Do not let the wires touch the ground. Do not make the wiring so tight that it experiences tension when turning.
Not all trailers have wired lights, but if given the option, it is a nice safety feature worth adding. In addition, larger trailers will also have electric brakes.
This is necessary for towing heavier loads, as it engages brakes on the trailer and does not solely depend on the vehicle’s brakes to stop everything.
Perform a Light Check
The final step is to perform a trailer safety check. You must confirm that the trailer lights work when using brakes and turn signals. It helps to have another person who can stand behind the trailer and ensure the lights turn on when they should.
Hook Up Your Single Axle Trailer
As you can see, there are several steps that you must take to hook up a single axle trailer. However, the process is not a complicated one. The most important thing to remember is to prioritize safety.
When you purchase your trailer from Pro-Line Trailers, you can feel confident that you have a high-quality trailer. Our inventory fleet includes single and double axle trailers of varying sizes.
Take the next step toward your towing goals by checking out our trailer specials.